The Evolution of Raspberry Pi
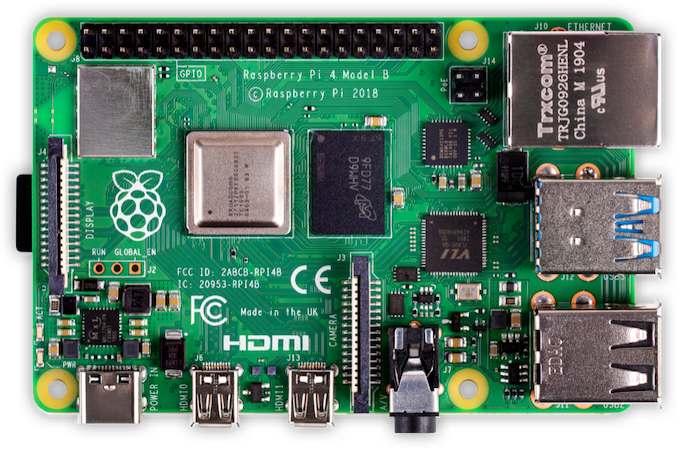
The Raspberry Pi, a marvel of modern computing, has come a long way since its inception in 2012. Originally designed to promote basic computer science in schools, it has evolved into a powerful, pocket-sized device loved by hobbyists, educators, and tech enthusiasts worldwide. The Raspberry Pi 4, the latest iteration, boasts enhanced processing power, memory, and connectivity options, making it an ideal choice for a plethora of applications.
Raspberry Pi 4 in Elderly Care
One particularly heartwarming application of the Raspberry Pi 4 lies in assisting the elderly. Imagine a scenario where an elderly person wants to watch their favorite movies on YouTube. Traditionally, this would require physical assistance or constant guidance. However, with a Raspberry Pi 4, family members can set up a system that allows them to remotely control the viewing experience. This setup not only empowers the elderly with entertainment but also offers peace of mind and convenience to their relatives.
Check out this awesome video from Caroline Dunn - here. Caroline explains how you can control your Raspberry Pi remotely using a graphical Remote Desktop-like solution. It's really useful, especially if you're into managing your Raspberry Pi without needing to be right next to it.
The Concern of Indicator LED Lights
Many elderly individuals have a habit of unplugging electronic devices, especially those with glowing lights, for fear of electricity consumption or simply due to the distraction caused by these lights. The Raspberry Pi 4, like most electronics, comes with indicator lights – a green LED for disk activity and a red LED for power.
Disabling Indicator Lights on the Raspberry Pi 4
To address this concern and ensure a comfortable experience for the elderly, we can programmatically disable these indicator lights on the Raspberry Pi 4. This approach ensures the device remains inconspicuous and does not cause any visual disturbance.
Log in to your Raspberry Pi, then switch to the root user by running sudo su.
To ensure compatibility with the example provided, let's first check the hardware and software version of your Raspberry Pi. This is important because the example was created and tested for specific hardware and software revisions.
Software, cat /etc/os-release:
PRETTY_NAME="Raspbian GNU/Linux 11 (bullseye)"
NAME="Raspbian GNU/Linux"
VERSION_ID="11"
VERSION="11 (bullseye)"
VERSION_CODENAME=bullseye
ID=raspbian
ID_LIKE=debian
HOME_URL="http://www.raspbian.org/"
SUPPORT_URL="http://www.raspbian.org/RaspbianForums"
BUG_REPORT_URL="http://www.raspbian.org/RaspbianBugs"
Hardware, cat /proc/cpuinfo:
...SKIP...

Hardware        : BCM2835
Revision        : c03115
Serial          : 1000000016d32638
Model           : Raspberry Pi 4 Model B Rev 1.5
If your software and hardware are matching or compatible, - go ahead and edit the /boot/config.txt file. Add the following lines:
# Disable Ethernet LEDs
dtparam=eth_led0=14
dtparam=eth_led1=14

# Disable the PWR LED
dtparam=pwr_led_trigger=default-on
dtparam=pwr_led_activelow=off

# Disable the Activity LED
dtparam=act_led_trigger=none
dtparam=act_led_activelow=off
Save the changes and then reboot your Raspberry Pi. That's it. The on-board LEDs should be switched off now.
Disabling LEDs on Raspberry Pi 2
If you've got previous model, e.g. after running cat /etc/os-release on a Raspberry Pi you'll see information like this:
PRETTY_NAME="Raspbian GNU/Linux 9 (stretch)"
NAME="Raspbian GNU/Linux"
VERSION_ID="9"
VERSION="9 (stretch)"
ID=raspbian
ID_LIKE=debian
HOME_URL="http://www.raspbian.org/"
SUPPORT_URL="http://www.raspbian.org/RaspbianForums"
BUG_REPORT_URL="http://www.raspbian.org/RaspbianBugs"
And cat /proc/device-tree/model will output e.g.:
Raspberry Pi 2 Model B Rev 1.1
...adding the following lines to your /boot/config.txt and rebooting will disable the power LED on your older version of Raspberry Pi:
# Disable the PWR LED
dtparam=pwr_led_trigger=default-off
dtparam=pwr_led_activelow=off
So, you need to change only dtparam=pwr_led_trigger to default-off in Disable the PWR LED section. off(!) not on like in modern version of your hardware.
By doing so, we not only make the Raspberry Pi a more elder-friendly device but also embrace the privacy-focused ethos that many users appreciate. The seamless blend of functionality and discreet operation makes the Raspberry Pi an even more versatile and considerate choice for a wide range of applications.
In conclusion, the Raspberry Pi's journey from an educational tool to a versatile device capable of enhancing the lives of the elderly is a testament to its adaptability and the ingenuity of its user community. By customizing it to operate in a 'private mode', we take another step towards making technology more accessible and less intrusive for everyone.
Bonus Tip: HDMI
The Pi's HDMI signal might be too weak for some devices to detect it right away. To fix this, you can force the Pi to always send the HDMI signal by adding hdmi_force_hotplug=1 to its config.
If your screen still isn't picking it up, increasing the signal strength with config_hdmi_boost=4 (or up to 9 for really stubborn cases) might help.
For computer monitors, set hdmi_group=1, and for older TVs, hdmi_group=2. Just remember, using hdmi_safe=1 can cancel out these settings.
My config:
# uncomment if hdmi display is not detected and composite is being output
hdmi_force_hotplug=1

# uncomment to force a specific HDMI mode (this will force VGA)
hdmi_group=1